How to Back Up Workstations with Synology Active Backup & Wasabi Cloud - Immutable
Learn how to securely back up Windows workstations using Synology Active Backup for Business and offsite Wasabi Cloud Storage. Protect your data from hardware failure, ransomware, and accidental deletion with this step-by-step guide, making your backup immutable
SYNOLOGY
2/20/20254 min read
How to Back Up Local Workstations with Synology Active Backup and Offsite Storage in Wasabi
Introduction
Protecting local workstation data is essential for businesses and individuals alike. Hardware failures, accidental deletions, malware, and ransomware attacks can lead to critical data loss. Microsoft Windows provides some built-in recovery tools, but they are limited, and cloud syncing services like OneDrive and Google Drive are not true backups—they cannot restore a full system or prevent ransomware encryption.
A better solution is Synology Active Backup for Business (ABB), which provides centralized workstation backups on a Synology NAS. However, on-site storage alone is not enough—if the NAS is stolen, damaged, or compromised, you could lose all your backups. This is why offsite backups to Wasabi Cloud Storage add a second layer of protection.
In this blog, we will cover:
Setting up Synology Active Backup for Business to back up Windows workstations.
Creating user accounts and configuring the best security settings.
Scheduling and managing backups effectively.
Backing up Synology to Wasabi Cloud Storage for redundancy.
Ensuring security best practices for both NAS and cloud backups.
Step 1: Preparing Synology NAS for Workstation Backups
Before configuring backups, you must properly set up your NAS and users to ensure secure and efficient backup storage.
1.1. Creating Users for Workstation Backups
Synology NAS uses user accounts to manage permissions and access control. Rather than using a single "admin" account (which is a security risk), you should create dedicated accounts for Active Backup users.
Best Practices for Creating Backup Users:
Use Unique Accounts: Each user (or workstation) should have its own account. Avoid sharing credentials.
Use Strong Passwords: Enable password complexity rules in Control Panel > Security > Advanced.
Disable Unused Protocols: If the user only needs access for backups, disable SMB, FTP, or other unnecessary services.
Enable Two-Factor Authentication (2FA): Add extra protection for admin-level accounts.
How to Create a User in Synology DSM:
Log into DSM and go to Control Panel > User & Group.
Click Create and enter a username and strong password.
Assign the user to a Backup Users group with limited permissions.
Under Permissions, only allow access to the backup shared folder.
Under Application Permissions, disable everything except Active Backup for Business.
Under Advanced Settings, enable account auto-blocking to prevent brute-force attacks.
Step 2: Installing and Configuring Active Backup for Business
2.1. Install Active Backup for Business
Open Package Center on your Synology NAS.
Search for Active Backup for Business and install it.
Launch the application and enable the PC Backup Service.
2.2. Install the Backup Agent on Windows Workstations
Each Windows PC requires the Active Backup for Business Agent to be installed.
Open Active Backup for Business on DSM.
Navigate to PCs > Download Agent and download the installer.
Install the agent on each workstation.
When prompted, enter the NAS IP address and assigned user credentials.
Select Full System Backup or Custom Volumes (e.g., only backing up C: drive).
Security Considerations for Backup Agents:
Only install the agent on trusted devices to avoid unnecessary load.
Restrict access to prevent unauthorized users from restoring or deleting backups.
Encrypt data in transit by forcing HTTPS connections.
Step 3: Creating a Backup Task for Workstations
Once the NAS and agents are configured, it's time to set up a backup schedule.
3.1. Configuring a New Backup Task
Open Active Backup for Business and go to PCs.
Click Create Task, select the workstation, and assign it to a backup policy.
Set the backup schedule:
Daily backups are recommended.
Hourly backups are ideal for critical systems.
Choose Incremental Backup to save storage space.
3.2. Retention Policy Best Practices
Retention settings determine how many backup versions to keep.
30 days for daily backups (standard recommendation).
90 days for compliance-sensitive data (medical, legal, etc.).
6 months for long-term retention needs.
Step 4: Configuring Offsite Backups to Wasabi Cloud Storage
On-site backups are not enough—a fire, flood, or ransomware attack can destroy local NAS storage. This is why offsite backups to Wasabi Cloud Storage provide an extra layer of protection.
4.1. Create a Wasabi Storage Bucket
Log into Wasabi.
Go to Buckets > Create Bucket.
Choose a region (closest to your location for best speed).
Enable Object Lock to make backups immutable (prevents accidental deletions or ransomware changes).
Copy your Access Key and Secret Key for authentication.
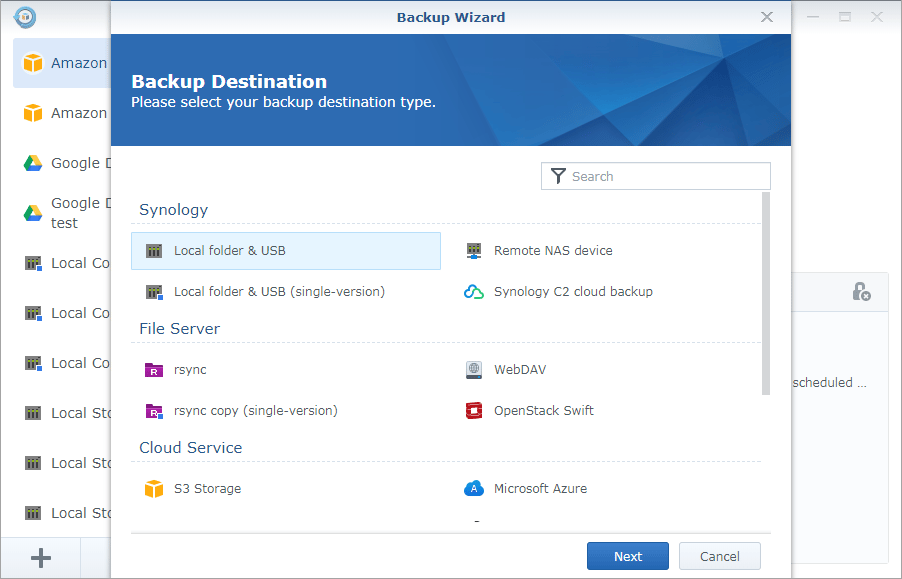
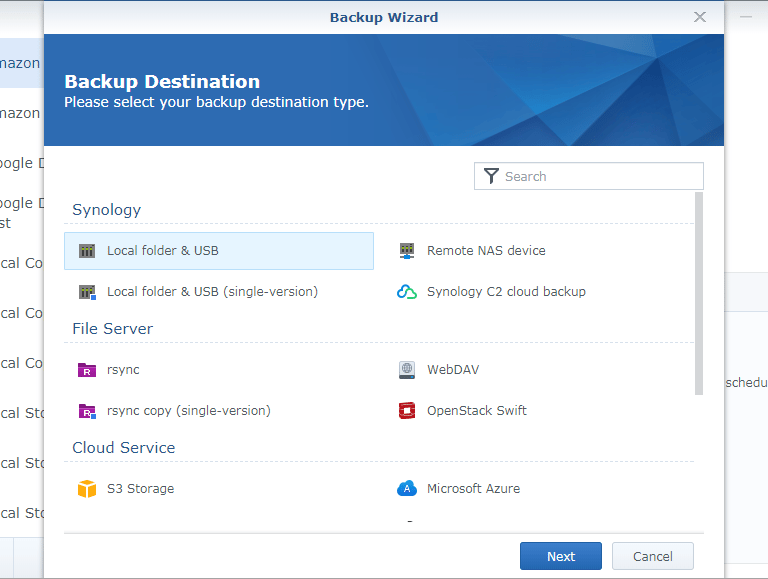
4.2. Configure Hyper Backup on Synology NAS
Open Hyper Backup from DSM Package Center.
Click Create > Data Backup Task.
Select S3 Storage as the destination.
Enter the Wasabi endpoint URL (e.g., s3.us-east-1.wasabisys.com).
Input your Access Key and Secret Key.
4.3. Selecting Backup Source and Schedule
Select the Active Backup for Business shared folder as the source.
Enable backup encryption for added security.
Choose versioning to retain multiple copies.
Set a backup schedule (e.g., daily at 2 AM).
Step 5: Ensuring Security Best Practices
5.1. NAS Security Enhancements
Change the default DSM ports to avoid common attacks (e.g., change HTTP port 5000 → 5500).
Disable admin account login and create a separate admin user.
Use a firewall to restrict external access.
Enable automatic DSM updates for security patches.
5.2. Wasabi Security Enhancements
Enable MFA (Multi-Factor Authentication) on your Wasabi account.
Use IAM policies to restrict which services can delete or modify backups.
Set up bucket policies to block all unauthorized access.
5.3. Periodic Testing and Monitoring
Regularly test restoring a workstation to verify backup integrity.
Set up email alerts in Hyper Backup for failed tasks.
Monitor Wasabi storage costs to optimize data retention.
Conclusion
By setting up Synology Active Backup for Business with offsite Wasabi storage, you create a secure, reliable, and scalable backup system.
Key Takeaways:
✅ Centralized NAS backups protect Windows workstations.
✅ Offsite Wasabi backups add an extra disaster recovery layer.
✅ Security best practices prevent unauthorized access and ransomware attacks.
By following this guide, your business is protected from data loss, system failures, and cyber threats.
Additional Resources
With these best practices, you now have a bulletproof backup strategy for your local and offsite data protection. 🚀
Southern IT LLC.
We'll Handle I.T.
Support
support@southernitllc.com
210-985-5510
© 2025. All rights reserved.
Texas DPS Private Security License: #173867402
Regulated by the Texas Department of Public Safety Private Security Program